
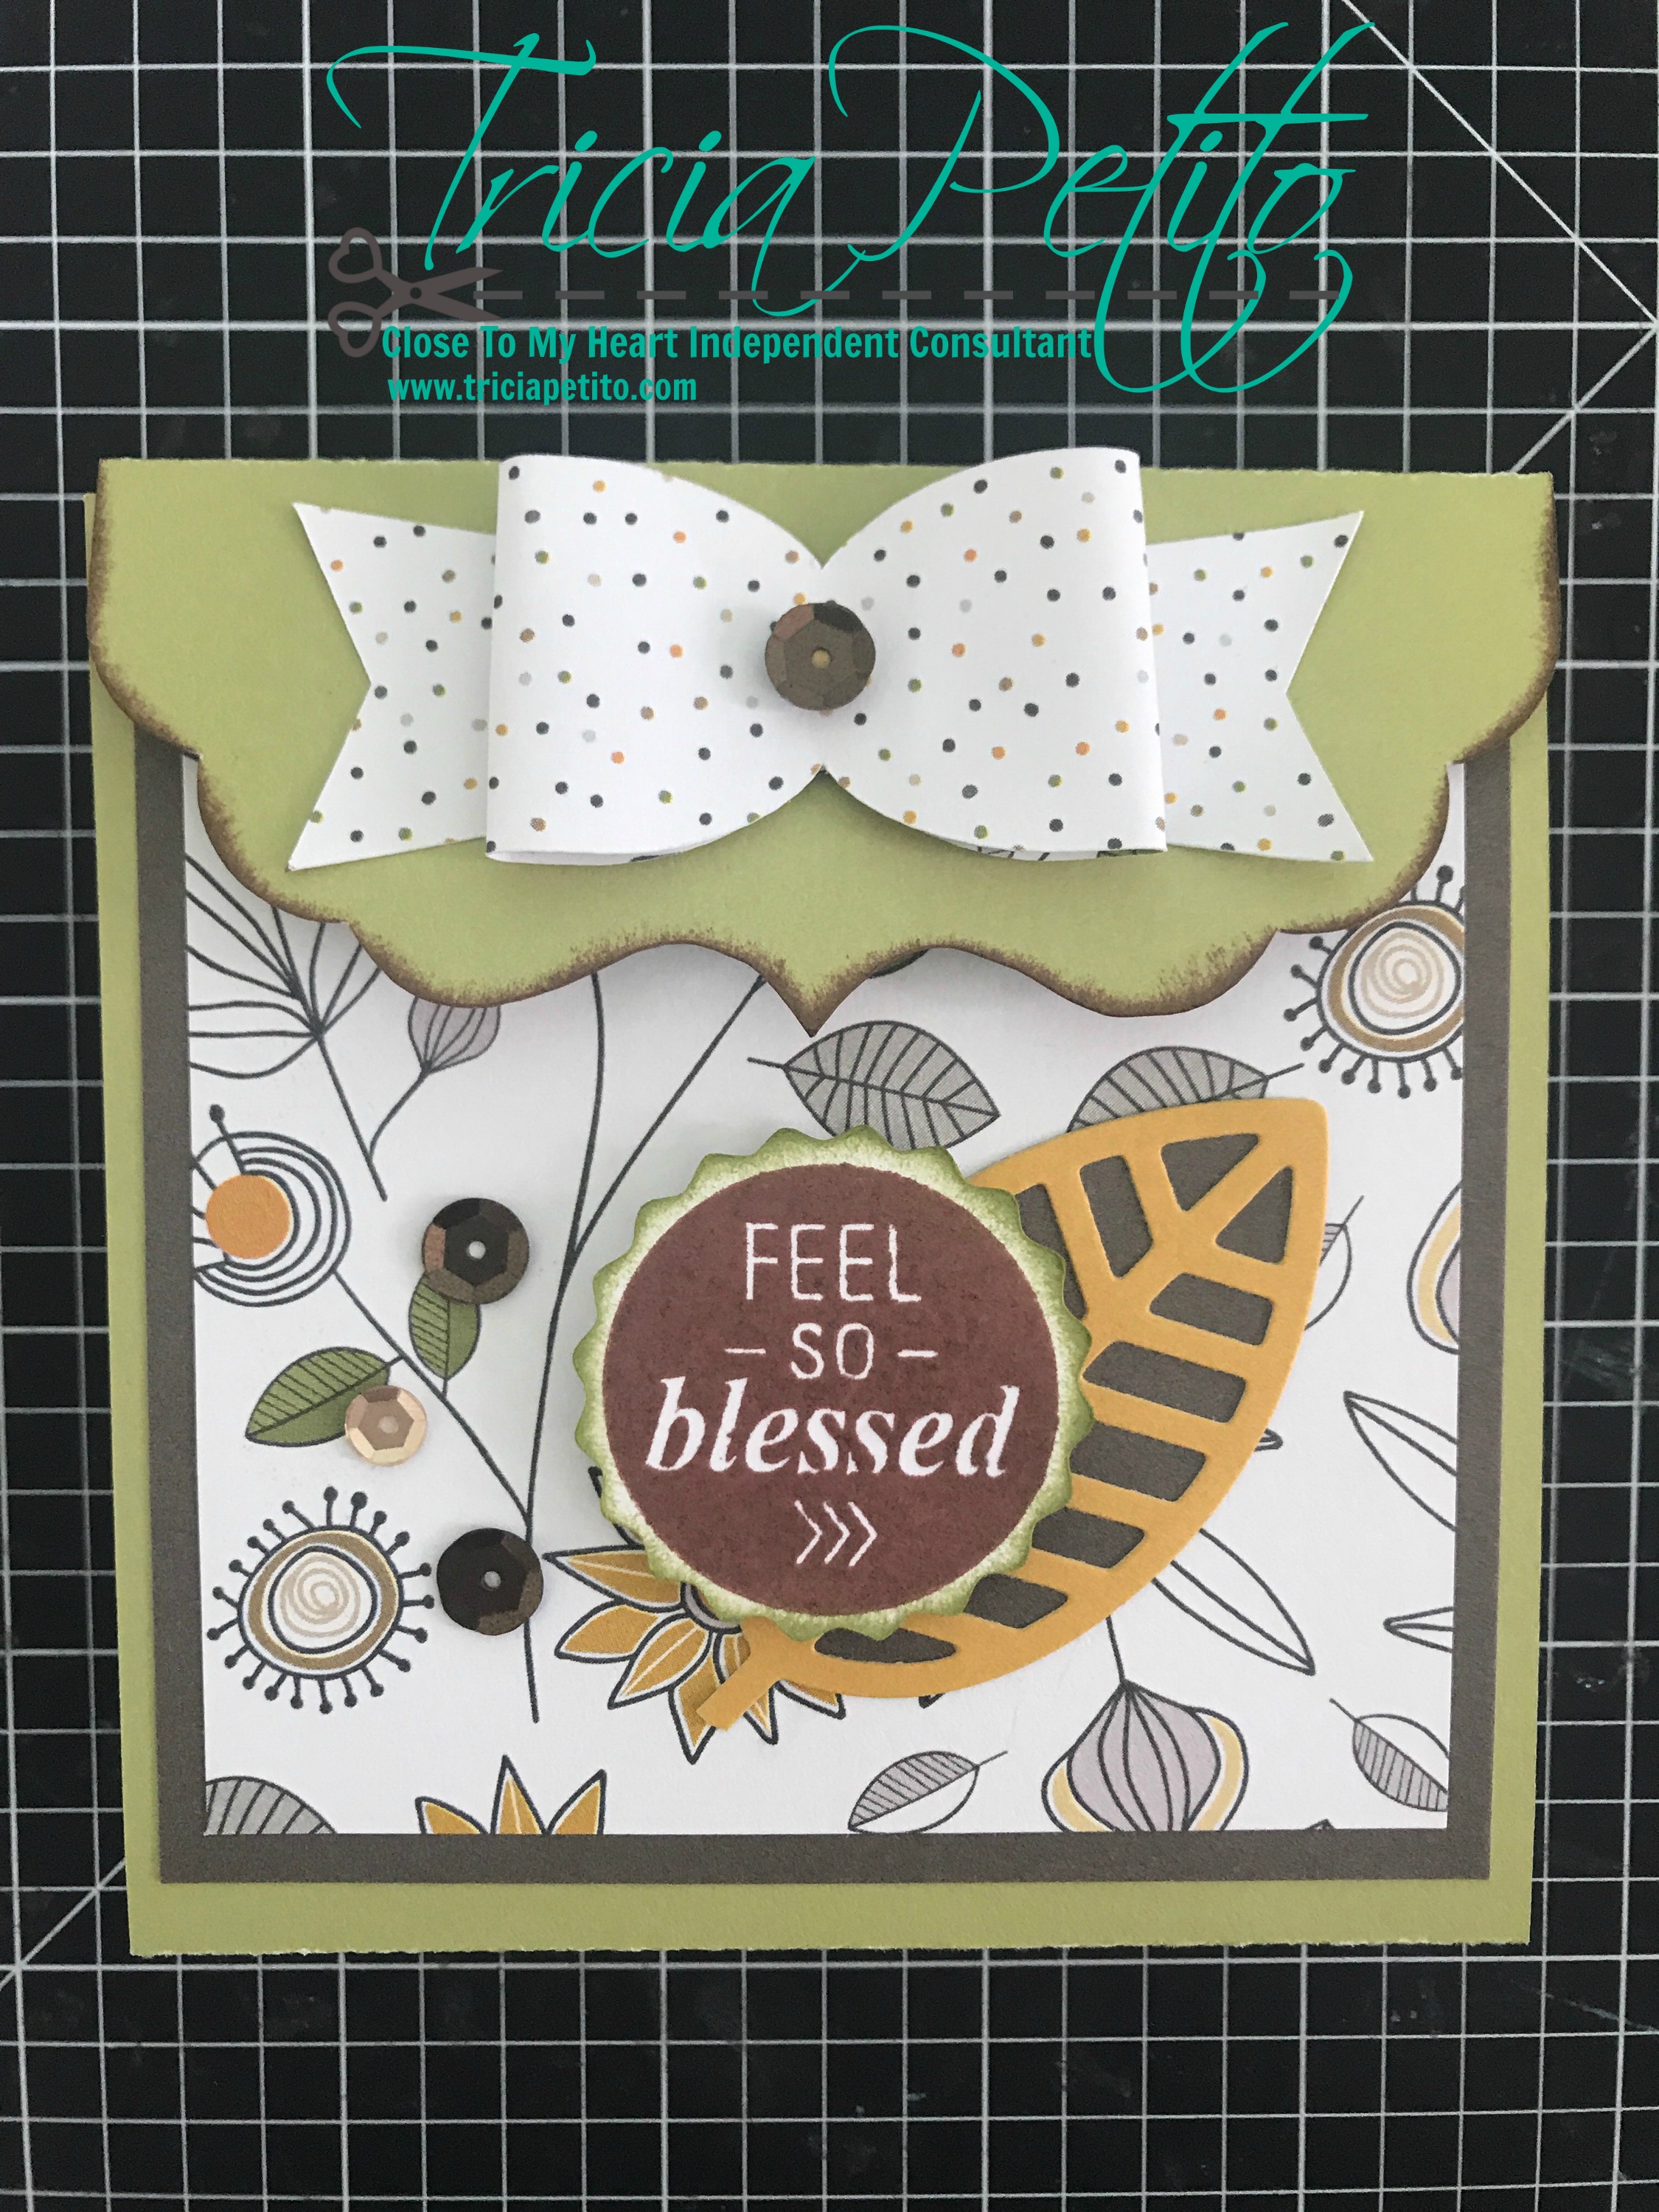
Happy Fall Y’all!!! One of my very favorite 3D projects this far has been these cute little post it note holders! These are so simple to make and who wouldn’t want one!!!! I could see making one every time a new holiday or a fun paper packet comes out. Here is how you do it:
Supplies used:
-“Falling for You” Paper Pack (X7223B)
-“Falling for You” Coordinating Cardstock (Espresso, Fern) (X7223D)
-White Cardstock
-Brad (in coordinating color)
-Bronze Sequins (Z4029)
-Zip Strip from “Falling for you” Paper Pack
-Stamp sets/Thin Cuts I used: S1709 Feel So Blessed, Z4041 Falling For You Stamp/Thin Cuts, Z4035 Leaf Thin Cuts
-Inks I used: Espresso, Godrush, Fern, Saffron, Nutmeg
-Cricut Cartridge: CTMH Artiste
-Cutter
-Bone Folder
-Adhesive
-Foam Tape
Step 1. Cut your Card base and bow out of the CTMH Cricut Artiste cartridge. Cricut Artiste: Accent 3> cut 1″ for bow (page 55). Cricut Artiste: Card> cut 3 3/4″ for holder (page 60). I cut the card base out of Fern cardstock and the bow out of the polka dot accent paper.

Step 2. Cut background accent paper (brown cardstock) to be 3 1/2 x 3 1/2. Then cut your floral accent paper to be 3 1/4 x 3 1/4. This is the paper that you will be putting your embellishments on.

Step 3. Using your bone folder, fold your card at the pre-scored lines. They are hard to see, but they are there if you cut/scored your card correctly in your cricut machine.

Step 4. Assemble your bow. This is a little tricky. In essence you are alining the holes. Get all the holes to come to the center one. Once they are all at the center hole, secure with a small brad that is a coordinating color to your papers.

Step 5. Glue all of your pieces together. I utilized the CTMH Bonding Memories, mainly because it is like cement and I didn’t want it to come apart later. Make sure your papers are covering up the little holes in your paper as you go.

Step 6. Embellish as you desire and place your post-it notes inside!!!!


Have fun creating your own holders! If you would like to order these products and more, please let me know!
Hope to see you again soon!
Happy fall!